How to Stop Avast from Running in the Background
Have you ever faced a frustrating situation where your computer slows down or becomes unresponsive due to Avast Antivirus running in the background? It’s a common issue that many users encounter, as Avast’s real-time protection and scanning features can consume significant system resources, especially on older or less powerful machines.
The solution is simple: you can temporarily disable Avast’s background processes or specific shields to free up system resources and improve your computer’s performance.
In this article, I’ll guide you through two methods to stop Avast from running in the background, allowing you to complete your tasks smoothly. Read on to learn.
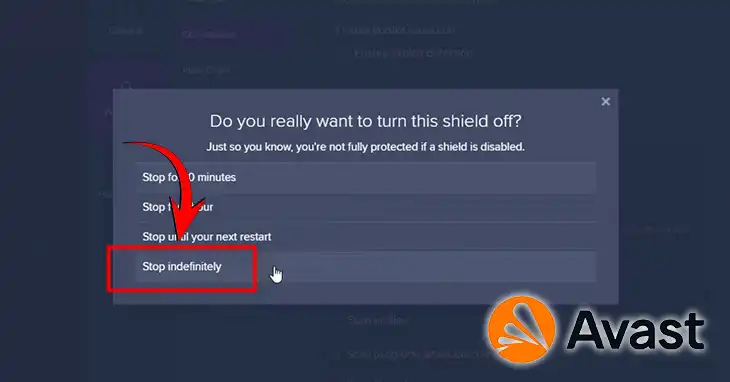
Solution 1: Disabling All Shields At The Same Time
One of the most effective ways to stop Avast from running in the background is to disable all its shields simultaneously. This method will temporarily pause Avast’s real-time protection, allowing you to complete resource-intensive tasks without any interference. Here’s how you can do it:
Step 1: Locate the Avast Icon
First, locate the orange Avast icon on your Windows taskbar, usually situated in the bottom-right corner of your screen. Right-click on the icon to open the Avast settings menu.
Step 2: Disable Shields
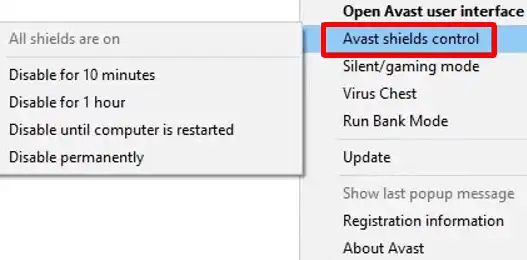
In the settings menu, navigate to the “Avast Shields” section. Here, you’ll find several options to disable the shields for a specific duration, such as 10 minutes, one hour, until the next restart, or permanently.
Choose the option that best suits your needs. For example, if you’re performing a quick task, disabling the shields for 10 minutes or an hour might be sufficient. However, if you’re planning to work on a resource-intensive project, you may want to disable the shields until the next restart or permanently.
Step 3: Confirm the Disable Action
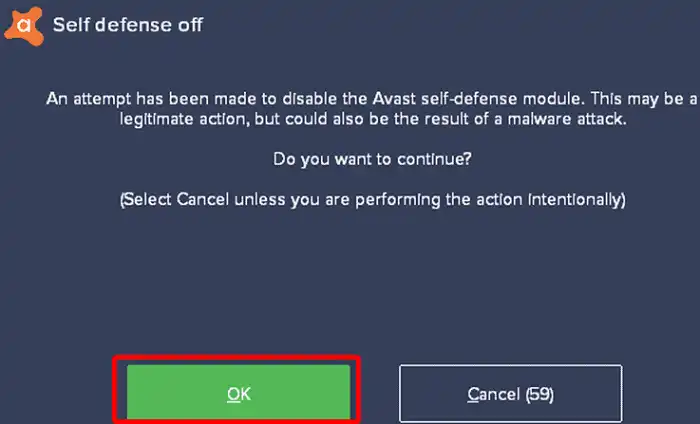
After selecting the desired option, confirm your choice by clicking “OK.” This action will pause all of Avast’s shields for the chosen duration, effectively stopping Avast from running in the background.
Step 4: Verify Shield Deactivation
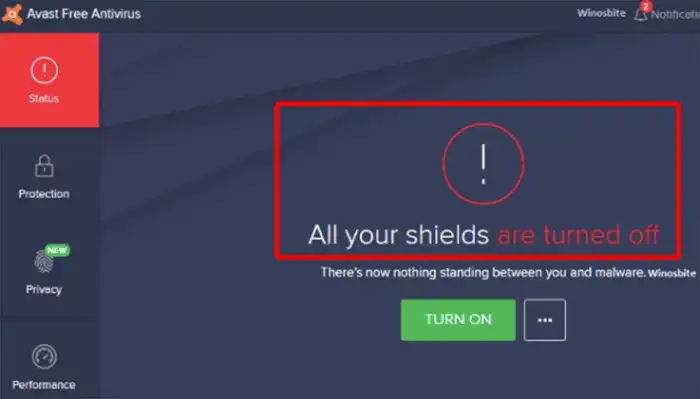
To verify that Avast has successfully disabled all shields, open the main Avast window and navigate to the “Status” tab. You should see a prompt indicating that the shields have been turned off.
If you receive this prompt, congratulations! You’ve successfully turned off all Avast shields, and the antivirus should no longer be running in the background, freeing up system resources.
Step 5: Reactivate Shields (Optional)
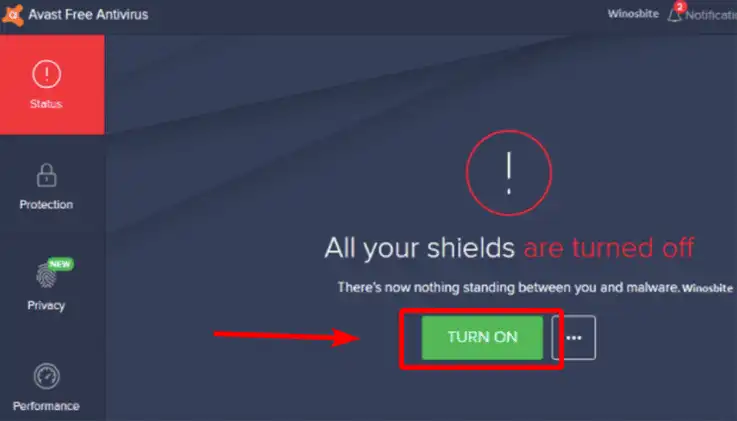
Once you’ve completed your tasks, you can reactivate Avast’s shields by clicking the “TURN ON” button in the main Avast window. This will restore Avast’s real-time protection and ensure your system remains secure.
Solution 2: Disable Avast Shields, One At A Time
If you prefer a more granular approach or want to maintain some level of protection while disabling specific Avast shields, you can follow this method:
Step 1: Open Avast User Interface
Start by locating the Avast icon on your taskbar (usually in the bottom-right corner) and double-click it to open the Avast user interface.
Step 2: Navigate to Core Shields
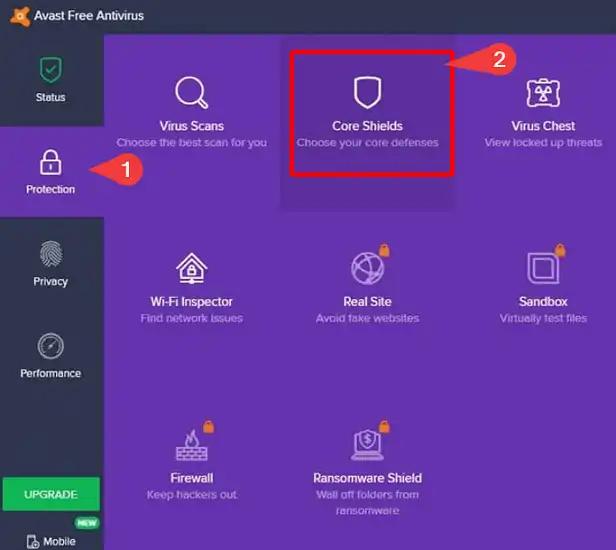
Once the Avast interface is open, navigate to the “Protection” tab and select the “Core Shields” option.
Step 3: Disable Specific Shields
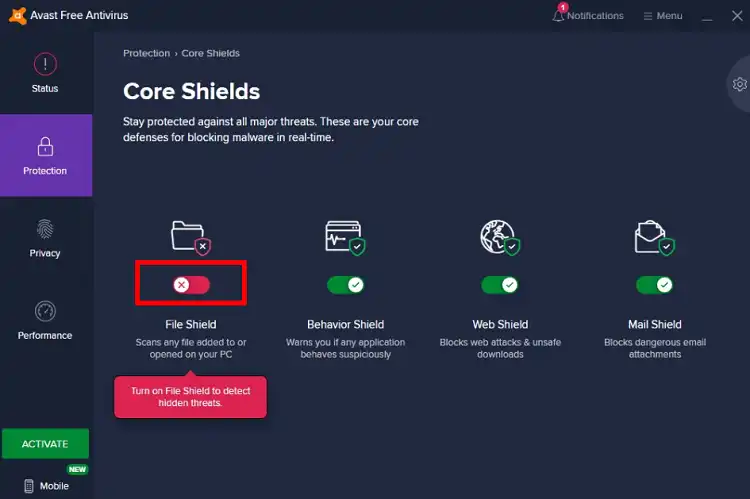
Inside the “Core Shields” section, you’ll find four different types of shields: File Shield, Web Shield, Mail Shield, and Behavior Shield. Each shield has an on/off toggle switch.
Depending on your needs, you can selectively disable one or more shields by toggling the corresponding switch to the “Off” position.
Step 4: Specify Disable Duration
After disabling the desired shield(s), Avast will prompt you to specify the duration for which you want the shield(s) to remain disabled. You can choose from options like 10 minutes, one hour, until the next restart, or permanently.

Select the option that aligns with your requirements, and Avast will disable the specified shield(s) for the chosen duration.
Reactivating the Disabled Shields
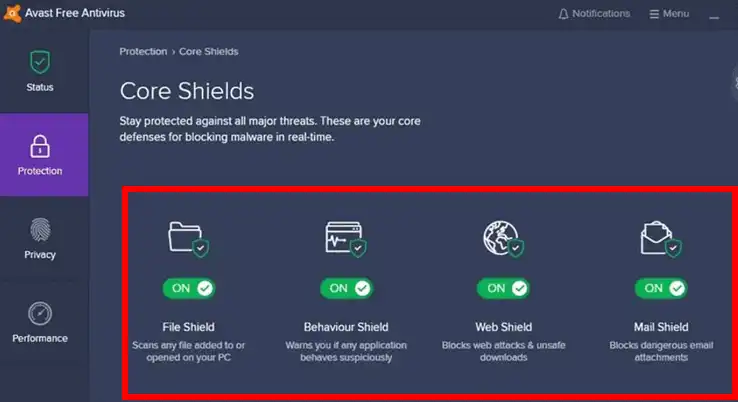
Once you’ve completed your tasks, you can reactivate the disabled shield(s) by navigating back to the “Core Shields” section and toggling the corresponding switch(es) to the “On” position.
This method allows you to maintain some level of protection while disabling specific Avast shields that may be causing performance issues or conflicts with your applications.
Wrapping Things Up
Disabling Avast’s background processes or specific shields can be a game-changer when it comes to optimizing your computer’s performance. By following the steps outlined in this article, you can take control of Avast’s resource usage and ensure that it doesn’t interfere with your daily tasks. If you have any further questions or encounter any issues while implementing these solutions, feel free to leave a comment below. We’re here to help you get the most out of your Avast Antivirus experience while ensuring optimal system performance. Thank you for reading, and we wish you a smooth and productive computing experience!
FAQs
What Is The Core Difference Between The Two Methods?
The core difference between the two methods is that the first method disables all Avast shields simultaneously, while the second method allows you to selectively disable specific shields one at a time.
Can I Disable Avast Permanently?
Yes, both methods provide an option to disable Avast shields permanently. However, it’s recommended to reactivate the shields after completing your tasks to maintain system security.
Will Disabling Avast Shields Compromise My System Security?
Disabling Avast shields will temporarily lower your system’s security level, as real-time protection and scanning features will be paused. It’s crucial to reactivate the shields once you’ve completed your tasks.
How Long Does It Take To Reactivate Disabled Shields?
Reactivating disabled Avast shields is a quick process. Simply navigate to the appropriate section and toggle the shield(s) back to the “On” position, and Avast will resume its protection services.
Can I Schedule Avast To Automatically Disable Shields?
Unfortunately, Avast does not provide a built-in option to schedule the automatic disabling of shields. However, you can manually disable and reactivate the shields as needed using the methods described in this article.


