What Does “Waiting for Cache” Mean on Chrome?
When browsing with Chrome, we rely on the browser’s ability to store and retrieve temporary data, like images and scripts, through a process called caching. This process ensures faster loading times for frequently visited websites by eliminating the need to download the same resources repeatedly.
However, when the system encounters a delay or issue with this process, you may see the error “waiting for cache.” This error typically appears when Chrome encounters delays in reading from or writing to its cache. It can slow down page loads, cause browser freezes, or even prevent websites from displaying correctly.
Whether it’s a lack of disk space, a corrupted cache, or misconfigured settings, the issue disrupts the seamless browsing experience users expect. In this article, we
How Do I Fix a “Waiting for Cache” Error?
In simple terms, this error occurs when Chrome is unable to read from or write to its cache efficiently. The cache, located either on your hard drive or SSD, temporarily holds data from previously accessed websites. If Chrome encounters delays accessing this storage or runs into other issues, it halts the page-loading process and displays this error.
Several factors can contribute to this problem, including:
- Insufficient storage space on your device.
- Corrupted cache files that prevent proper functioning.
- Extensions or settings interfering with caching processes.
- Browser bugs or an outdated Chrome version.
Fixing this error involves addressing both immediate and underlying issues. Try to follow these steps and see if it helps.
1. Clear Chrome’s Cache
Over time, the cache accumulates data that may become corrupt or outdated, leading to errors. To clear it:
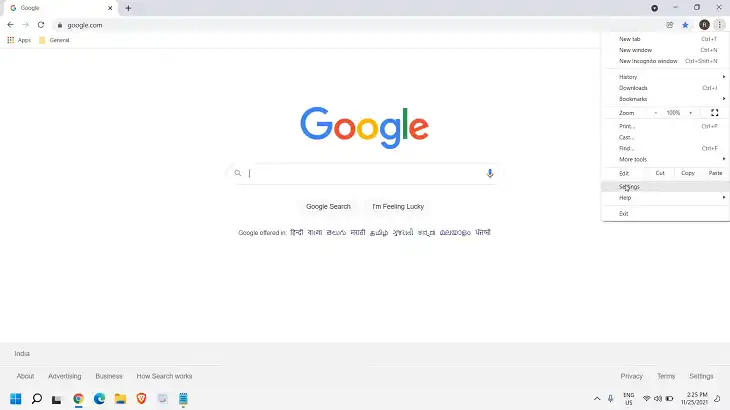
- Open Chrome and click the three-dot menu at the top-right corner.
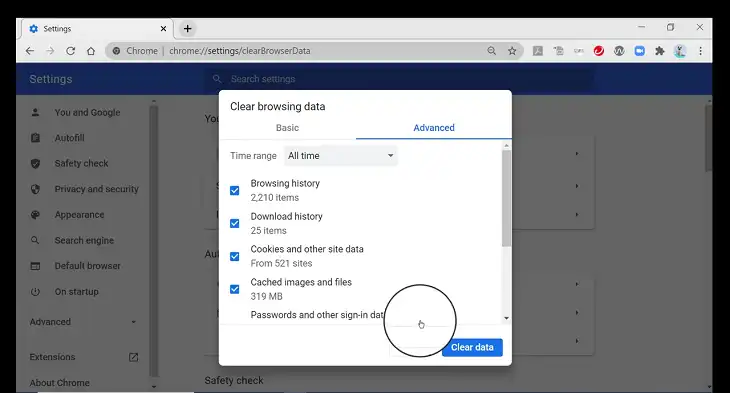
- Go to Settings > Privacy and security > Clear browsing data.
- Select Cached images and files and choose a time range (e.g., “All time” for a complete reset).
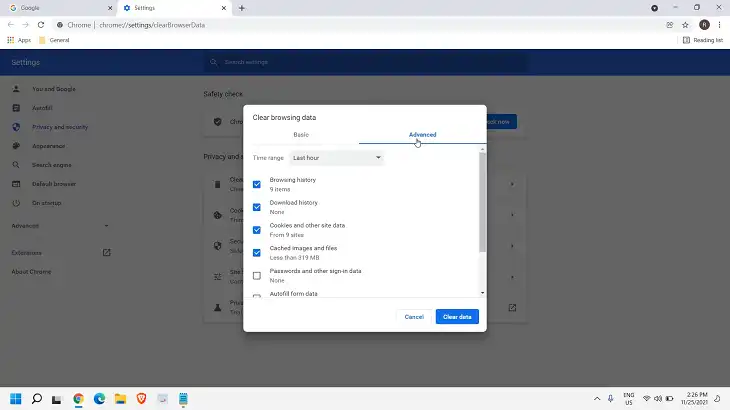
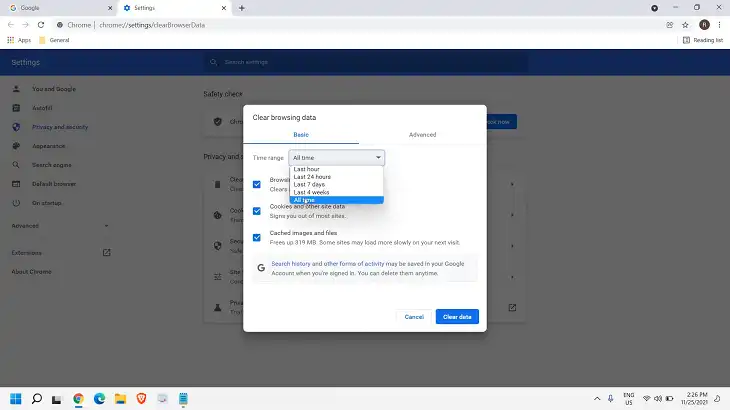
- Click Clear data and restart Chrome.
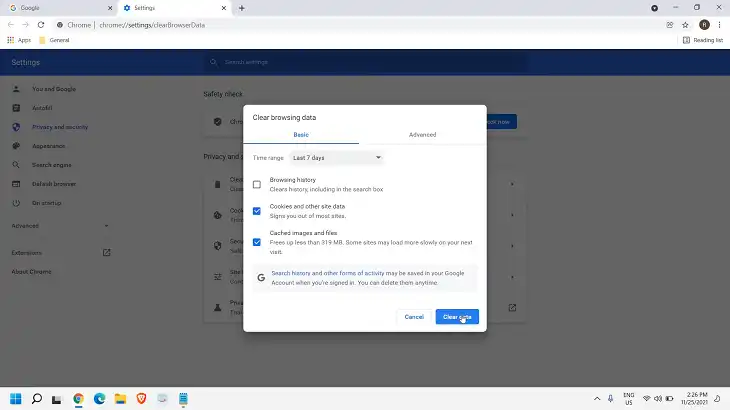
This process ensures that Chrome starts fresh with new cache files, eliminating the chance of corrupted data causing problems.
2. Check Available Disk Space
Chrome’s cache relies heavily on your system’s storage. If disk space is insufficient, the browser struggles to manage cache data.
- On Windows, right-click the drive in File Explorer, select Properties, and check free space.
- On Mac, use About This Mac > Storage to view space allocation.
Ensure you have at least 10-15% of your total storage free. If necessary, delete unnecessary files, uninstall unused programs, or transfer large files to external storage.
3. Reset Chrome to Default Settings
Misconfigured browser settings can interfere with caching. Resetting Chrome restores it to factory settings while preserving bookmarks and passwords.
Go to Settings > Reset and clean up > Restore settings to their original defaults.
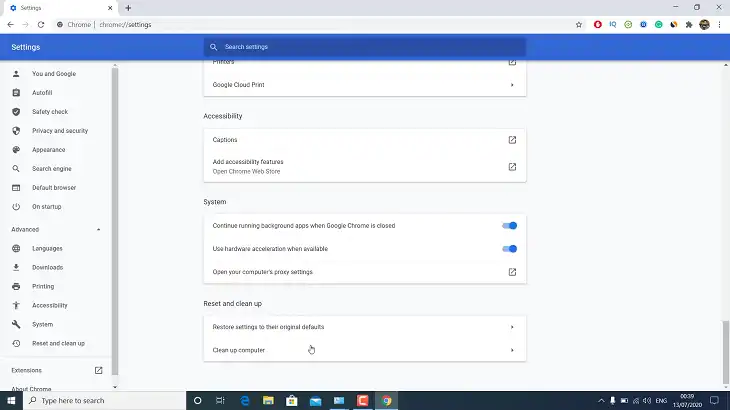
Confirm the action and restart Chrome.
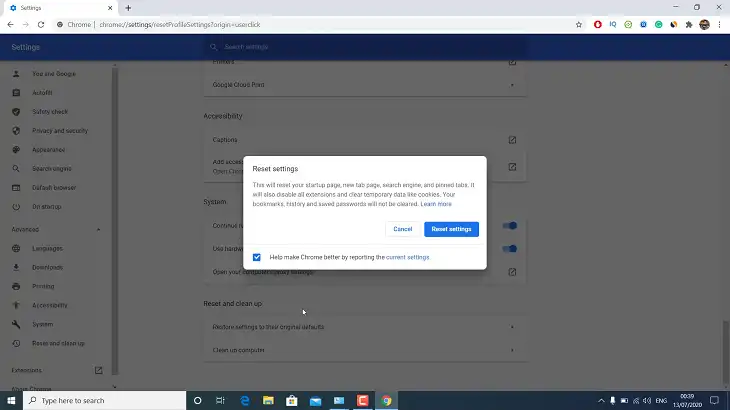
This step resolves issues caused by incorrect configurations or conflicting settings.
4. Disable Problematic Extensions
Certain extensions can interfere with Chrome’s caching mechanisms, especially those handling content or ad blocking.
- Navigate to chrome://extensions/.
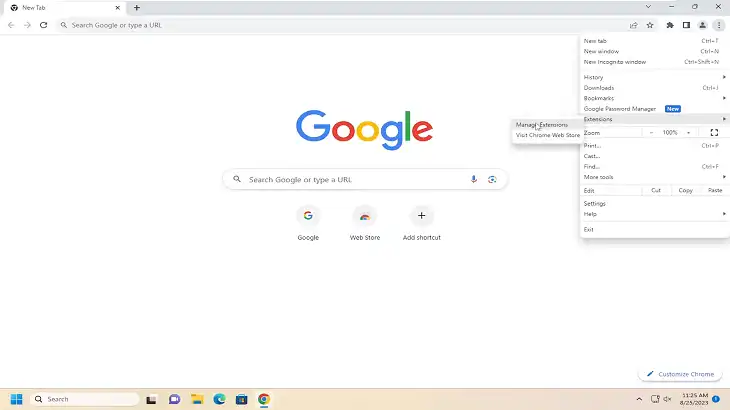
- Toggle off all extensions and reload the problematic page.
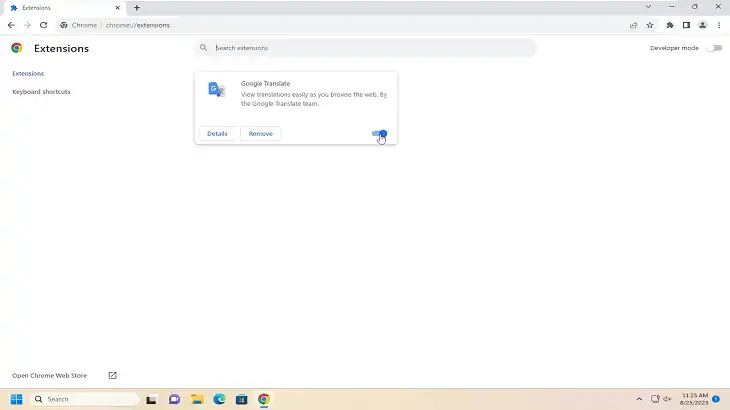
- If the error disappears, re-enable extensions one by one to pinpoint the culprit.
Extensions like ad blockers or script managers are common offenders, so pay close attention to them during testing.
5. Create a New Chrome Profile
User profile data can become corrupted over time, leading to persistent issues. Creating a new profile helps determine whether the error is tied to your current one.
- Open Settings > You and Google > Manage profiles > Add profile.
- Follow the prompts to create a new profile and log in.
- Test browsing with the new profile to see if the issue persists.
If the new profile resolves the error, you can migrate essential data like bookmarks while leaving behind potentially corrupt configurations.
How Do You Resolve Caching Problems?
Caching errors aren’t limited to “waiting for cache.” Broader issues, such as outdated or incomplete page content, often require different approaches:
1. Bypass the Cache
Force Chrome to reload the latest version of a web page by pressing Ctrl + F5 (Windows) or Command + Shift + R (Mac).
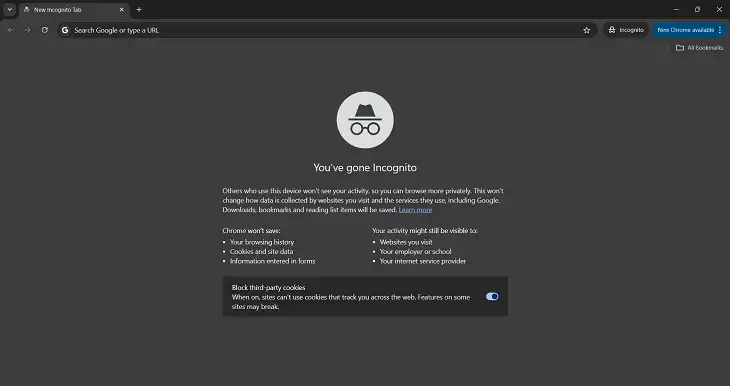
2. Use Incognito Mode
Incognito mode doesn’t use stored cache files, offering a quick way to test if cache issues are causing website problems.
3. Adjust Cache Size
You can modify Chrome’s cache size to prevent performance bottlenecks.
- Open chrome://flags.
- Search for “disk cache size” and adjust the value based on your device’s storage capacity.
4. Check for Chrome Updates
Outdated browser versions can introduce bugs that affect caching. Update Chrome by navigating to Settings > About Chrome and installing the latest version.
5. Reinstall Chrome
If all else fails, uninstall and reinstall Chrome. This ensures a clean installation, free of corrupted files or misconfigurations.
Frequently Asked Questions
Why Does Chrome Rely on Cache?
Cache enhances browsing speed by storing reusable data locally, reducing the need to download resources for every visit. This saves bandwidth and ensures faster load times.
Can Clearing Cache Cause Data Loss?
No, clearing the cache only removes temporary files. Personal data like bookmarks, saved passwords, and browsing history remain unaffected.
Is “Waiting for Cache” Related to Hardware Problems?
While rare, issues like low disk space, slow storage drives, or insufficient RAM can impact caching. Upgrading hardware may help if these limitations are persistent.
Conclusion
The “waiting for cache” error can be frustrating, but it’s often a symptom of fixable issues like corrupted files, insufficient storage, or misconfigured settings. By taking a systematic approach—clearing the cache, ensuring ample disk space, and checking for extensions or profile issues, you can quickly resolve the problem.
Besides. maintaining a well-optimized browser by updating Chrome, managing extensions, and periodically clearing the cache can prevent similar issues from arising. With these proactive measures, you can enjoy a smoother and more efficient browsing experience.

