How to Enable Virtualization on Bluestacks?
I’ve been really into playing my favorite Android games on Bluestacks lately. The ability to play mobile games on my computer is so convenient. However, I started noticing issues – stuttery frame rates, lag spikes, and graphics that didn’t look as smooth as they should. No matter what settings I tweaked, the problems persisted.
That’s when I came across posts from the Bluestacks community about enabling “virtualization” on my computer. The developers highly recommend turning this feature on as it will boost the performance 5 times more than before, solve lag/stutter issues, get the highest graphical support in the game, and so on!
I did and experienced the changes as well! Want to experience that? Then be my guest and read this article till the end!
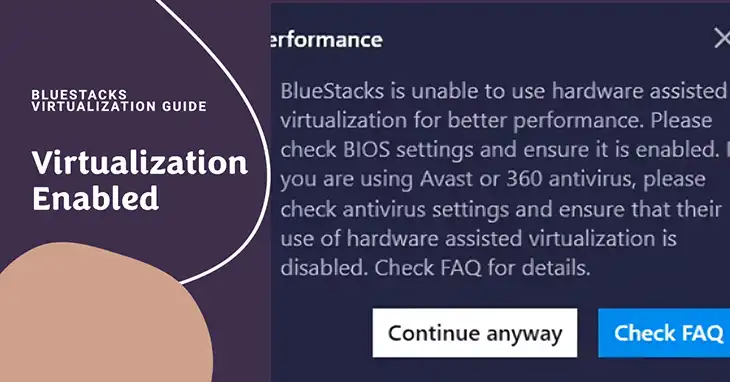
Step-by-Step Guide to Turn On Virtualization for Bluestacks
Basically, Bluestacks itself doesn’t have an option to turn on virtualization. Virtualization is a feature built into your computer’s processor. You will need to enable it from your BIOS settings!
Whether you have an Intel or AMD processor and which version of Windows you use determines how to enable virtualization. Here are the general steps:
Step 1 – Restart UEFI Firmware Settings
First, we need to restart the UEFI (Unified Extensible Firmware Interface) firmware settings, also known as the BIOS. Here’s how:
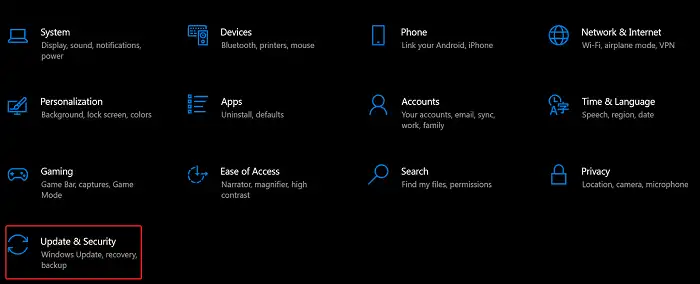
- Open the Windows Settings app by pressing the Windows key + I.
- Click on Update & Security.
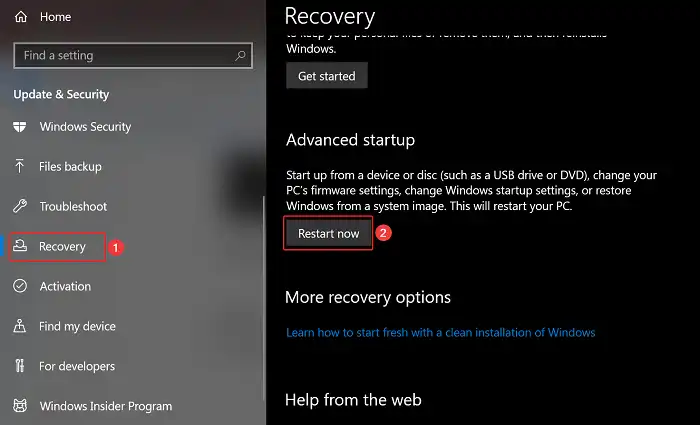
- In the left pane, select Recovery. Under the Advanced Startup section, click the Restart now button.
- After your computer restarts, you’ll see a list of options. Select Troubleshoot.
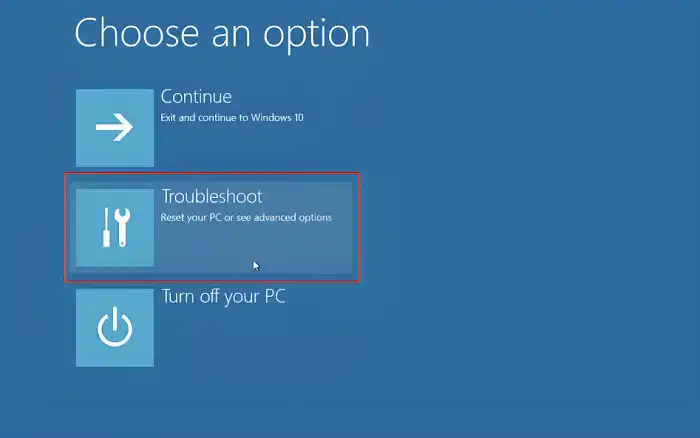
- Next, choose Advanced options.
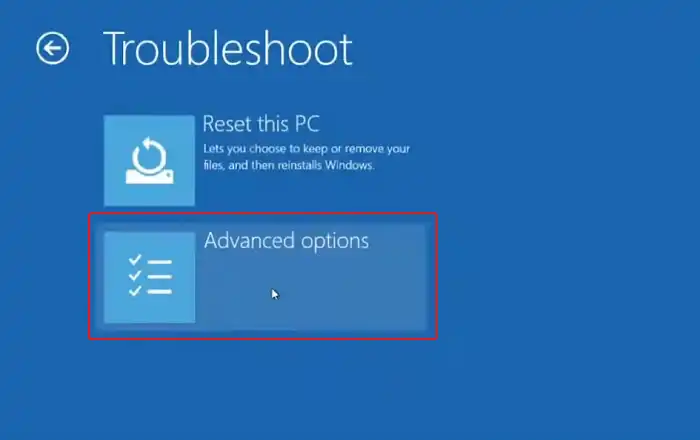
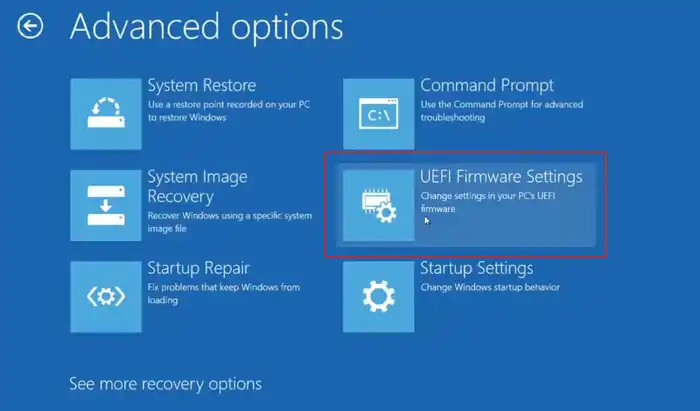
- Click on UEFI Firmware Settings.
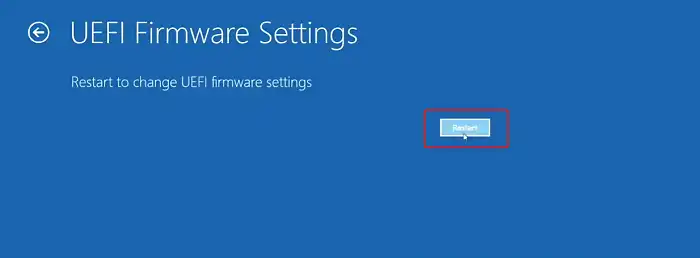
- Finally, click Restart to boot into the BIOS setup utility.
Step 2 – Navigate to the BIOS Settings
When your computer restarts, you’ll be greeted with a screen prompting you to enter the BIOS setup utility. The key you need to press varies depending on your computer’s manufacturer, but it’s usually one of these: Delete, F2, F10, or F12.
Keep an eye out for a brief message telling you which key to press. If you miss it, you can try pressing each of those keys repeatedly until you enter the BIOS settings.
Step 3 – Locate and Enable Virtualization
Once inside the BIOS settings, you’ll need to find the option to enable virtualization. The location of Virtualization may vary from different motherboards. Most of the time, you can find it inside the Advance settings > CPU Configuration. In my case, I found it in the Advance settings.
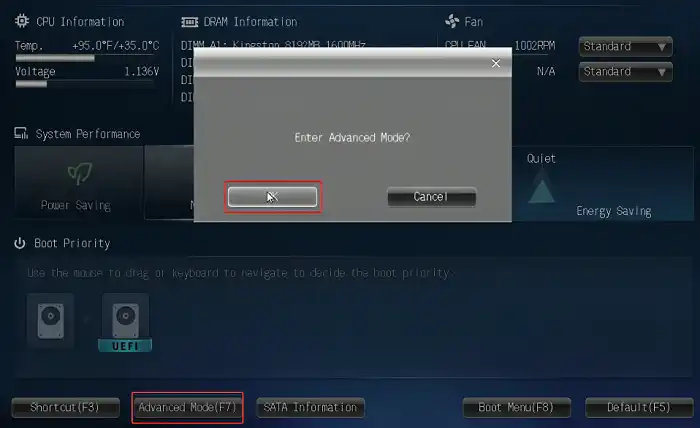
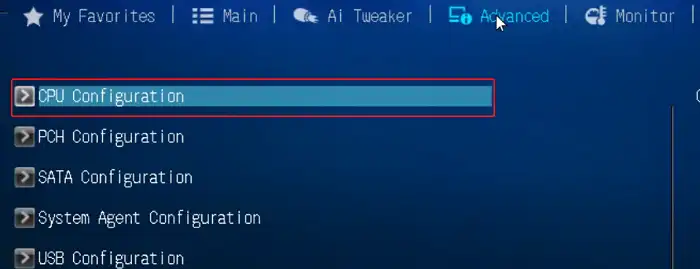
The name of this setting can differ depending on whether you have an Intel or AMD processor.
For Intel CPUs: Look for settings labeled “Intel Virtualization Technology (VT-x),” “Virtualization Extensions,” “Vanderpool,” or something similar. Enable the option.
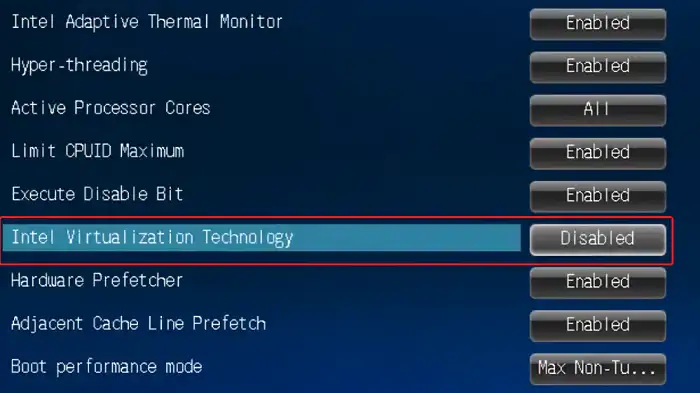
For AMD CPUs: Search for options like “AMD-V,” “SVM Mode,” or “AMD Virtualization Technology.” Turn on the appropriate setting.

The virtualization option may be buried within the submenus, so take your time and look carefully. If you’re having trouble locating it, consult your computer’s manual or search online for guidance specific to your model.
After enabling virtualization, save the changes and exit the BIOS settings. Your computer will restart with the new settings applied.
Location of Virtualization Technology in Different Laptops
While the general process of enabling virtualization remains the same, the exact location of the setting can vary depending on your laptop’s manufacturer. Here are some common places where you might find the virtualization option in the BIOS settings:
- HP & Acer: Look for the virtualization setting under the System Configuration section.
- Dell & Asus: Check the Advanced tab or menu.
- Lenovo: The virtualization option is often located within the Security section.
If you’re having trouble locating the setting, don’t hesitate to consult your laptop’s user manual or perform a quick online search for your specific model. Manufacturers sometimes use slightly different terminology or organize their BIOS settings differently.
Bottom Line
You may think enabling virtualization is difficult but it’s easier than your imagination! But the performance benefits of Bluestacks are very much worth it. Your computer will create an optimized virtual Android environment. You will see a big difference in speed, graphics quality, and overall smoothness. No more stuttering gameplay or long load times. You will get pure, uncompromised Android emulation power.
If you followed the steps but still have issues, leave a comment below. I will happily provide more troubleshooting tips. We are in this together. We want the best possible Bluestacks experience on our PCs. Thank you for reading. Enjoy lag-free gaming!

